Saturday, January 23, 2010

Bow to My Will, Chard!

So we meet again, Swiss Chard. 
 

Even in the depths of the most frigid winter, you greet me from inside the Boston Organics box, too big to properly store in a paper towel lined plastic bag in the refrigerator, and too "exotic" to tackle straight away.  I postpone your use, waiting for some sort of divine inspiration to hit me in a moment of inspirado: "Aha! Butternut Squash and Chard Lasagna!" or "Sauteed Moroccan Chickpeas and Chard!"  But by the time I bite the bullet and enthusiastically reach for you in the refrigerator, you've wilted and browned, rendering yourself completely useless.  WELL NOT THIS TIME, CHARD ...
 

... not this time.
 

First of all, since the tag on the bunch read "Green Chard," I was compelled to Google the different between "Green" and "Swiss."  From what I can tell, Swiss Chard comes in Red and White varieties, and the White is also referred to as Green (can't someone just decide on one name?).  Having discovered/decided this, I predictably searched TasteSpotting for recipes and gathered a few I thought looked good, simple, and easy.
 

A few hours later, I found myself in bed, exhausted, and not feeling very well.  I was craving comfort food, and so I decided to try the easiest recipe I'd found earlier in the day: Browned Butter Pasta with Tatsoi

"What the crap is Tatsoi?" you ask?  I have no idea.  It's some sort of Chinese green for which spinach or chard can be substituted.  Close enough.
 

I was excited to make browned butter.  I've seen it done on TV and I've certainly eaten (and enjoyed) it, but up until tonight, I'd never given it a try.  Here's what I discovered: it is SO easy, SO quick, and SOOO delicious.  I was a bit dubious at first - it releases such a strong, rich odor that I thought I might not like it - but as soon as I added some sage (dried, because I didn't have fresh; and remember, always use less dried herbs than fresh when substituting), it blossomed into a glorious scent and I couldn't wait to dig in.
 

All in all, this meal took me less than 20 minutes to cook and less than 10 minutes to devour.  I highly recommend it.  Also, keep in mind that in the same way I substituted chard for tatsoi, one could easily use spinach or collards or any other dark, hearty greens in this recipe.  Check out the Cook's Thesaurus for a quick reference guide on the different varieties and how best to cook them.
 

And so, Mr. Chard, the next time you show up on my back porch, I just may get to you before you spoil.  I plan on enjoying every second of it, too.
 

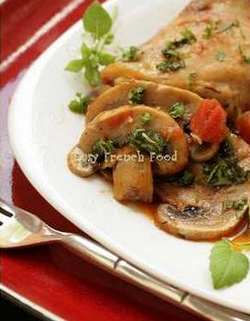
PASTA WITH CHARD IN A BROWN BUTTER LEMON SAGE SAUCE (adapted from Appetite for China)

(photo from Appetite for China)
 

1 box pasta (I used ziti and loved it)
1/2 stick unsalted butter

1 bunch chard, leaves torn from stems and shredded or julienned

1/2 cup chopped fresh sage or 1 tsp dried sage

1/2 ripe lemon, seeds removed
1 cup grated parmesan cheese
Salt and pepper


Bring a large pot of heavily salted water to boil over high heat.  Add the pasta and stir.
 

When the pasta is almost done, melt the butter in a large skillet over medium heat. Swirl the butter in the pan as it foams.  Meanwhile, remove the pasta from the heat and drain in a colander.
 

Once the butter has browned slightly, add the sage and swirl again.  Add the drained pasta and stir to coat.  Add the chard and toss with the pasta.  Squeeze the lemon over the pasta and greens and cover.  After a few minutes, remove the cover and stir.  The greens should be wilted.
 

Season to taste with salt and pepper. Plate and serve with grated parmesan.
 

This dish could be easily dressed up by adding other ingredients such as toasted pine nuts, currants or golden raisins, red pepper flakes, and/or crumbled goat cheese or feta.  However, the simplicity of the recipe above was just what I was looking for this quiet Saturday evening.  I can't wait to have it again tomorrow.
 

- M

Monday, January 11, 2010

In Praise of Processed Foods

OK.  This is going to sound ridiculous, but after tonight's meal, I just can't help but publish a post in praise of the Old El Paso Fajita Dinner Kit.

After a horrible night's sleep last night and an insane day at work, the odds of me making and legitimately enjoying a home-cooked meal were slim to none; however, thanks to the blessed companies Goya and Old El Paso (and Betty Crocker, apparently!), Matt and I were able to toast with our delicious Gascon Malbec to a fabulous and relaxing Monday night meal together.

Maybe I like the convenience of pre-made seasoning sauce packets and microwaveable tortillas!  So sue me!  Just trust.  With a few tweaks and additional ingredients, these fajitas are incredibly flavorful and fresh (and, yes, easy).

MORGAN'S OLD EL PASO FAJITA DINNER (adapted from Old El Paso)

(picture from Mi blog es tu blog)

1 Old El Paso Fajita Dinner Kit (includes flour tortillas, seasoning packet, and sauce packet)
2 tbs olive oil
2 tbs butter
2 - 4 boneless skinless chicken breasts
1 white or yellow onion, thinly sliced
1 bell pepper (any color), thinly sliced
1/2 head romaine lettuce chiffonade
1 bunch cilantro, stems removed
jarred salsa (we used Green Mountain Gringo - Hot)
sour cream
shredded Mexican-style cheese (any mix will do)

1 box Latin-style rice (I recommend using anything GOYA - I particularly enjoy their Yellow Rice [Arroz Amarillo] and Curry Rice [Arroz Curry])

Start boiling the water for the rice (follow the instructions on the box - I usually add either 1 tbs of oil or butter to the water, depending).  The rice actually takes the longest out of anything else in this meal!

Meanwhile, clean and slice the onion, bell pepper, and lettuce, and clean and tear apart the cilantro.  Set aside.  Cut the chicken breasts into thin strips.  (Note: Sometimes the chicken breasts are thick enough that I will cut them in half horizontally to allow for thinner pieces.)

*** Be sure to add the rice to the boiling water before you start cooking the fajita filling, otherwise the rice won't be done on time.  The cooking time for boxed rice is usually around 20 - 25 minutes.  (Note: I've found that the instructions on boxes of rice generally produce a wet result.  Therefore, I add a tiny bit less liquid and turn the burner on a tiny bit higher than recommended.  Disclaimer: your mileage may vary.) ***

Melt 1 tbs butter and 1 tbs olive oil in a large skillet over medium heat.  Add the chicken strips and give the pan a shake to keep the chicken from sticking.  Add a little bit of salt and pepper to season (not too much - there's plenty of salt in the seasoning packet!).

Once the chicken is seared on all sides, add the onion, pepper, and seasoning packet, and if necessary, another tbs of oil.  Stir to coat.  After the vegetables have sweat out a little bit of liquid (1 - 3 minutes), add the contents of the sauce packet.  (Note: Old El Paso says not to cook the sauce at all; however, I like the it to be warm and evenly distributed throughout the filling, not simply drizzled on top of the finished product.)

While the sauce heats through, take the tortillas out of their foil, place them on a plate, cover with a paper towel, and microwave on high for 60 seconds.

At this point, the filling, rice, and tortillas will all (hopefully) be done.  Bring to the table along with the lettuce, cilantro, sour cream, salsa, and shredded cheese.  Build your fajitas using any combination of the above ingredients that you desire!

I may be a "foodie," but I'm not a snob - and with this blog entry, I rest my case.

- M

Sunday, January 10, 2010

Merry Christmas To Me!

It happened.

I got a Le Creuset oval Dutch Oven from Matt for Christmas.  It's even the same color as the Le Creuset stockpot I already had.

I could've died.

In honor of this majestic occurrence, I scoured TasteSpotting for recipes that necessitated a Dutch Oven.  The one I found that utilized ingredients I already had in my kitchen was a recipe for "Chicken Marengo" - or "Poulet à la Marengo" - from a website called Easy French Food (what most people would consider an oxymoron).  The recipe is touted as being both easy and quick ... and while it was relatively simple, it did take a fair amount of time.  I wouldn't exactly throw this together on a weeknight after a hard day's work, but it was an enjoyable weekend adventure.

A few notes:

In place of white wine (which I didn't - and rarely ever do - have on hand), I purged my supply of martini vermouth.  It has a bit of a stronger flavor, but I used less of it than the recipe called for, and it worked great.  I also didn't have any canned diced tomatoes, so I diced up two juicy fresh tomatoes and used those.

Something I felt was missing from the recipe was liquid.  I wanted a bit of a sauce to result from my efforts so that the egg noodles would be coated in flavor.  To this end, I dissolved the called-for bouillon cube in 2 cups of hot tap water and added that to the pan.  The result was great.

The leftovers held us for days, and each day it tasted as good as the day before.  The only thing I would do differently next time is use bone-in chicken with the skin on (which is NOT what the recipe calls for).  The resulting sauce would be that much richer.  I might also add the optional bourbon if I have any on hand.
 

CHICKEN MARENGO (adapted from Easy French Food)

(photo from Easy French Food)

8 pieces chicken, skinned
salt and pepper
1/2 cup flour
2 tablespoons butter
2 tablespoons olive oil
1 onion, peeled and chopped
2 cloves garlic, peeled and minced
1 cup dry white wine or vermouth
1 14-1/2 ounce can diced tomatoes
or 2 diced fresh tomatoes with juices
1 chicken bouillon cube dissolved in 2 cups hot water
1 teaspoon dried thyme
12 ounces mushrooms, washed, dried and sliced
1 tablespoon cognac (optional)
1 tablespoon chopped fresh parley or basil

1 package egg noodles
2 tablespoons butter

Season the flour with salt and pepper before coating the chicken pieces. Melt the butter with the olive oil in a heavy skillet on medium heat and add the chicken pieces. Brown the chicken on all sides and remove from the skillet.

When all the chicken has been browned, add the onions and garlic to the skillet and cook on medium heat, stirring occasionally for five minutes. Add the white wine (or vermouth) and scrape any bits clinging to the bottom and sides of the skillet into the wine. Add the tomatoes, bouillon cube dissolved in water, and dried thyme, then the browned chicken pieces. Cover the skillet and simmer on low heat for 30 minutes.

While the mixture simmers, bring a large pot of salted water to boil.  When you add the mushrooms to the skillet (see below), add the egg noodles to the water and stir - that way, the two components should be done at around the same time.  After draining the egg noodles, return them to the pot and stir in the butter to coat.

Meanwhile, while the egg noodles boil, add the mushrooms to the skillet and cook for 15 minutes. If using, stir in the cognac 5 minutes before the end of the cooking time. Stir in the chopped herb just before serving.

Serve over the egg noodles.  Sprinkle Parmesan cheese over the top if desired.

Makes 4 to 6 servings.

- M